
How to Insert Captions to Your AI Video
The Video Editor can automatically generate captions for your AI video, which you can then edit and style from the Captions panel.
Step 1: Generate Auto Captions
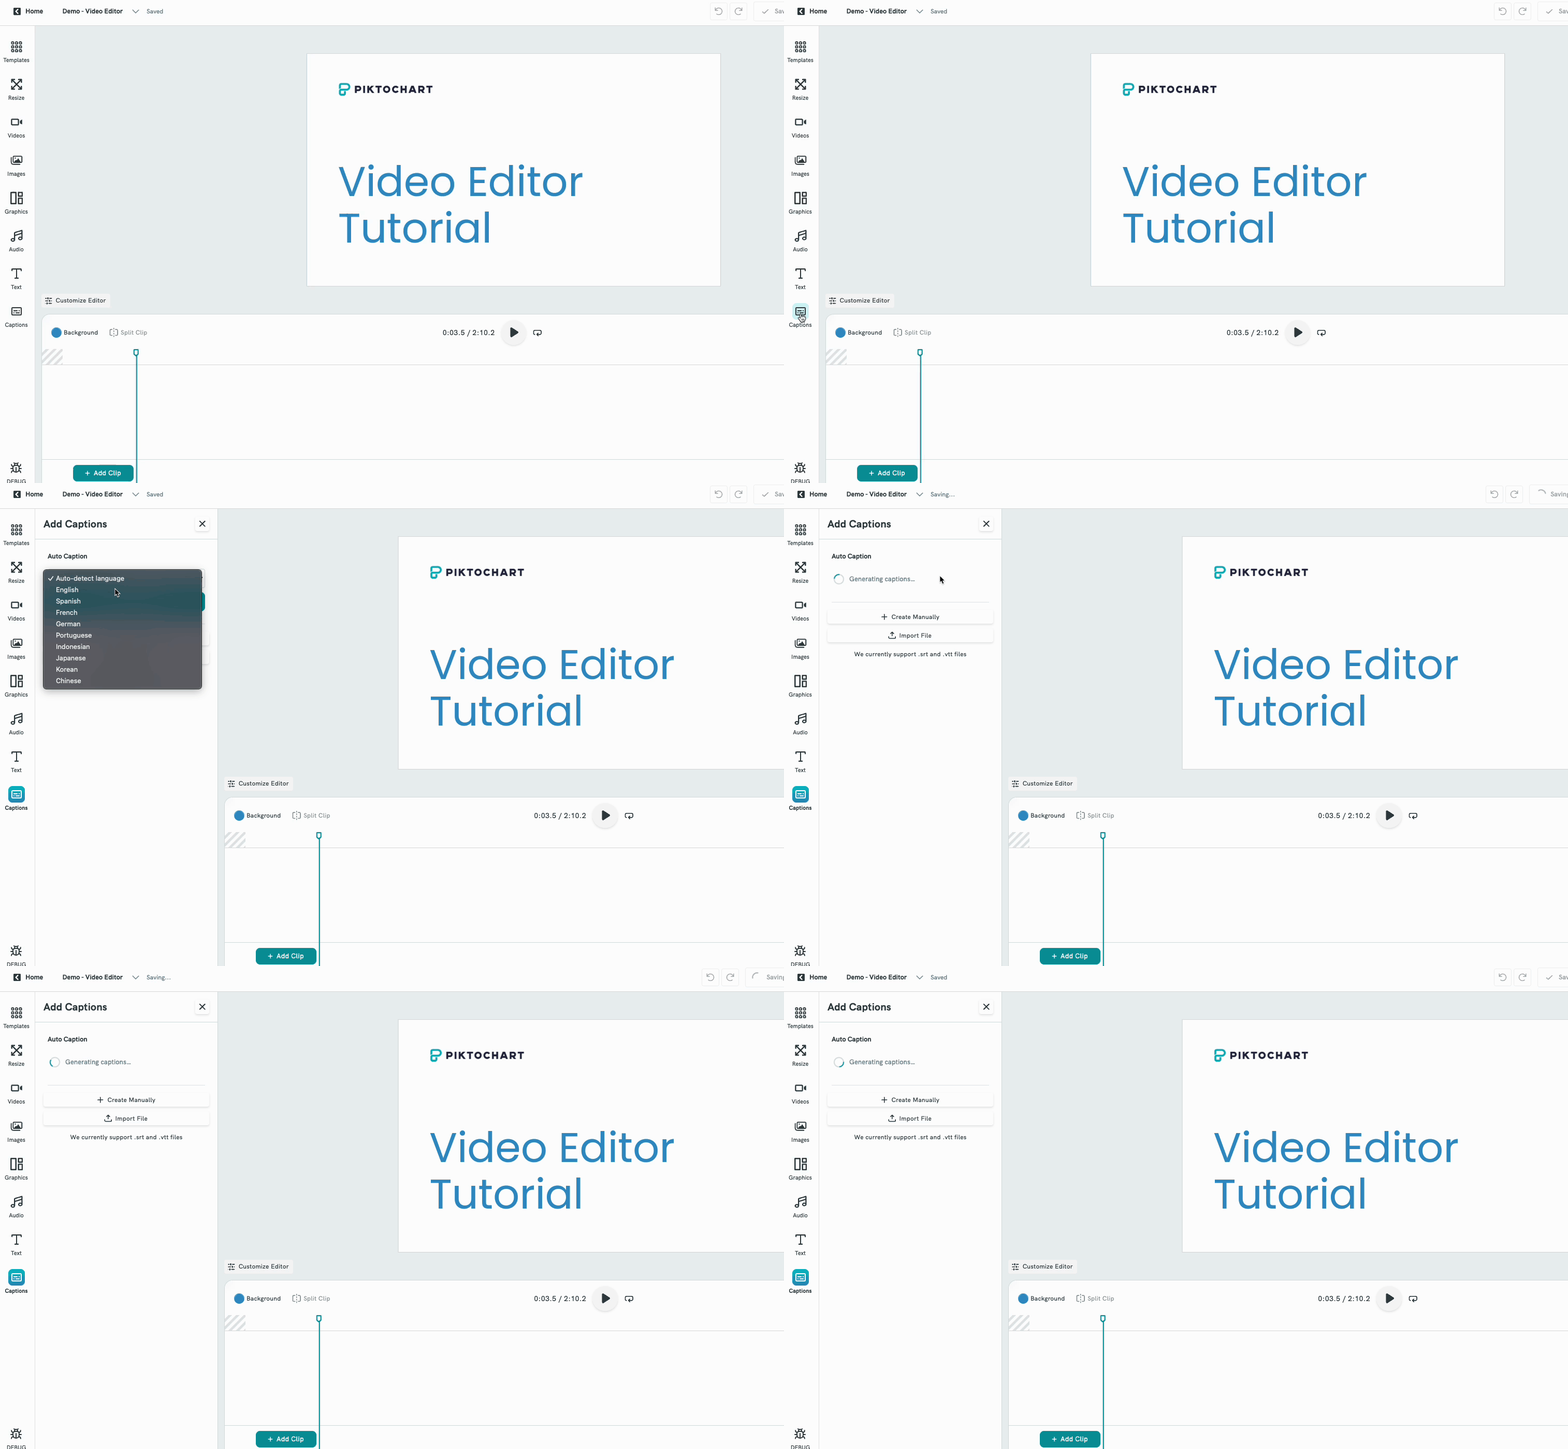
- In the Video Editor, click the Captions icon in the left sidebar to open the Captions panel.
- Under Auto Caption, use the language dropdown to select your preferred language (or leave it on Auto-detect language).
- Click Generate captions.
- Within a few seconds, the editor will automatically generate captions based on your video's audio, and they'll appear as text blocks in the Content tab and on the timeline.
- Instead of auto-generating captions, you can also add them manually:
- Type them in yourself — click into the Content tab and type each caption line directly, using Add after to create new lines as needed.
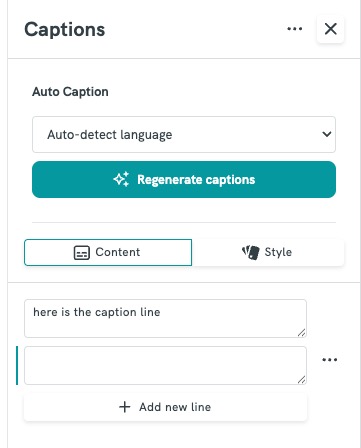
- Upload a caption file — import an existing .srt or .vtt file to bring in captions you've already prepared elsewhere.
Step 2: Edit Caption Content
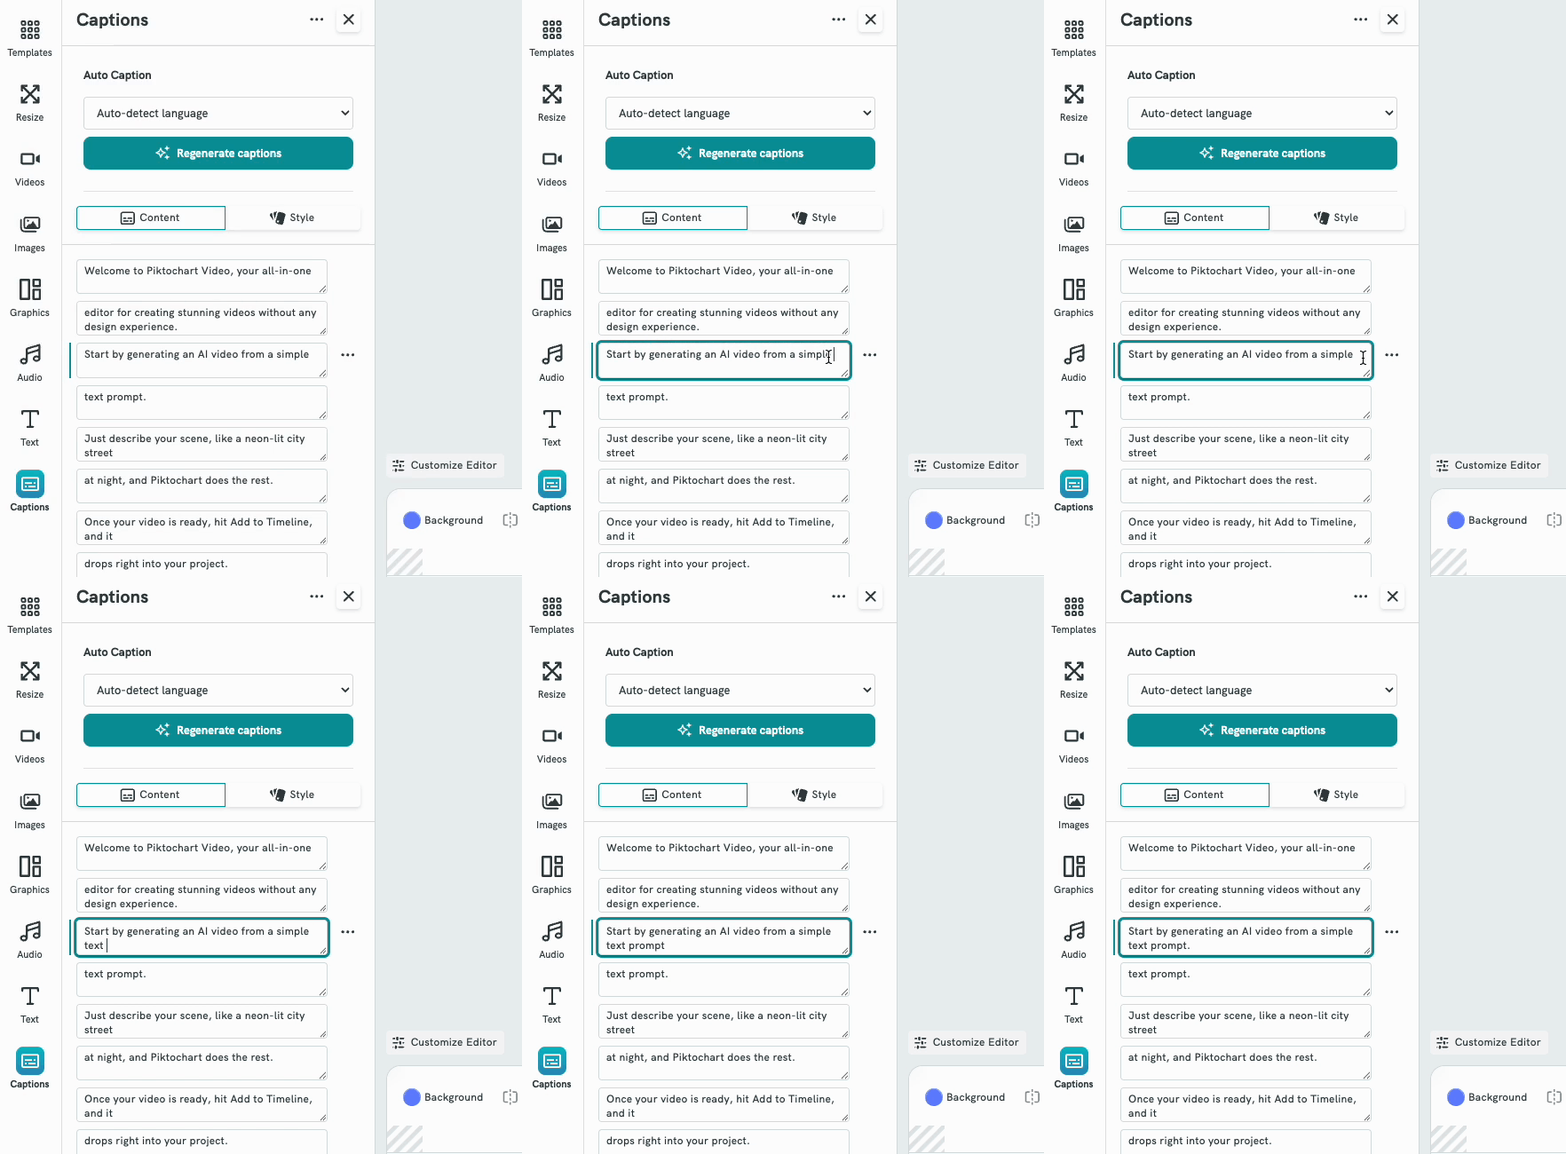
- Stay on the Content tab of the Captions panel, where each caption appears as its own editable text block.
- Click directly on any line to edit the text — this is useful for fixing any auto-generated captions that came out incorrect.
- Click the three-dot (⋯) menu next to a caption line for more options:
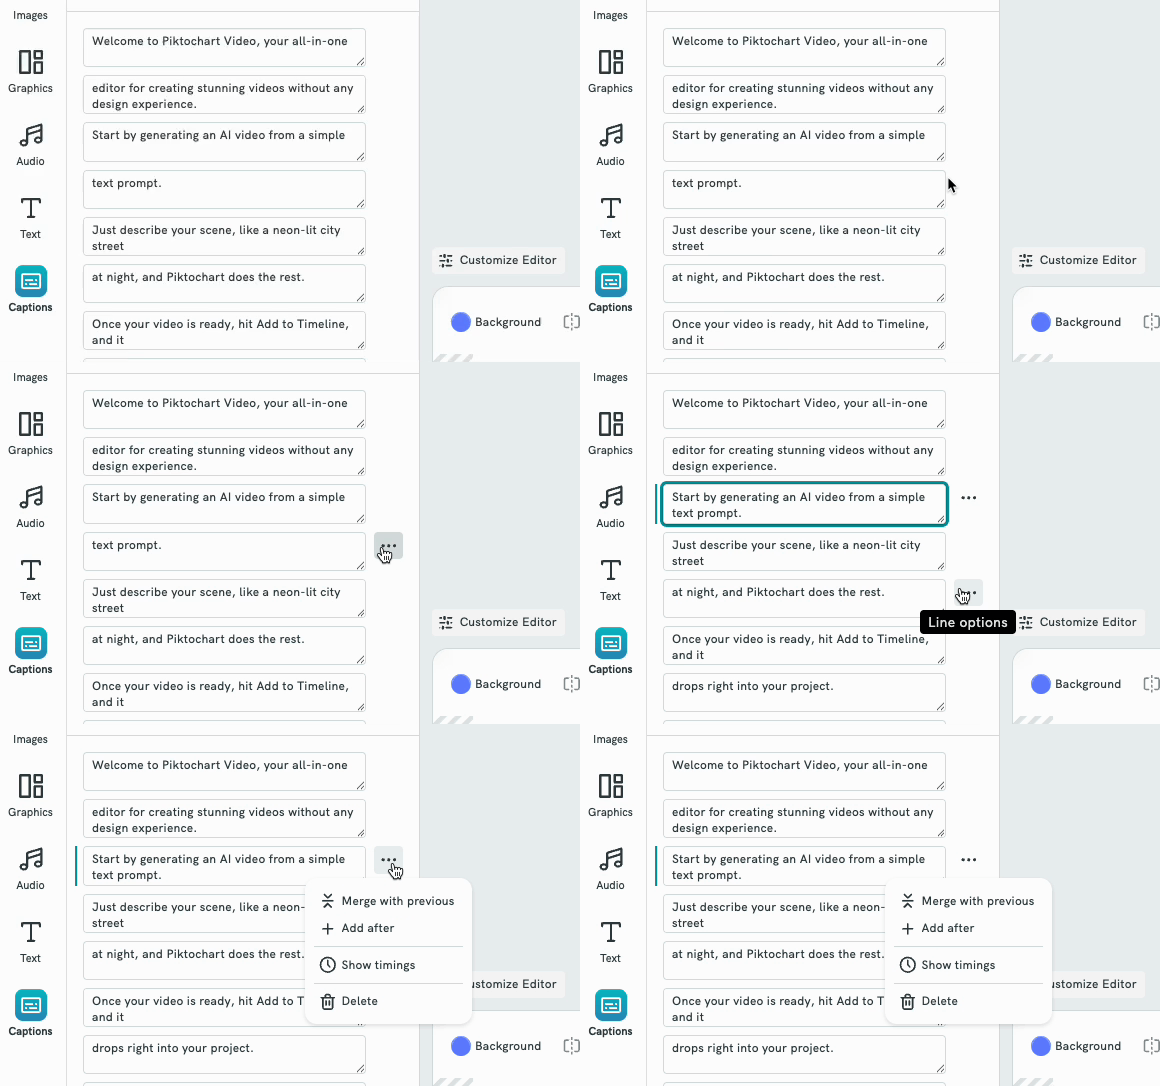
- Merge with previous — combines the line with the caption before it.
- Add after — inserts a new caption line right after it.
- Delete — removes the line entirely.
- Click Show timings (or Hide timings) to toggle the start/end timestamps next to each caption line, which can help you line up edits with the video more precisely.
Step 3: Style Your Captions
- In the Captions panel, click the Style tab.
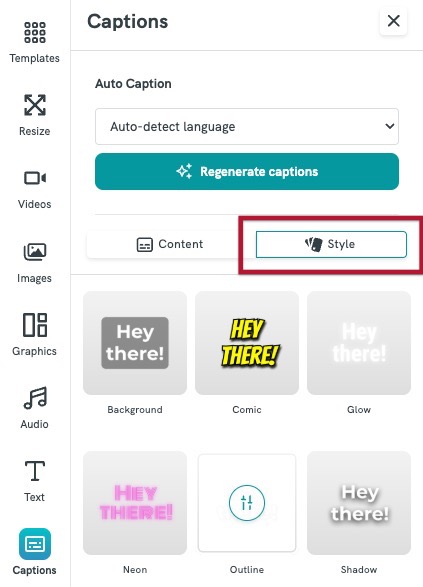
- Choose from the available caption presets to instantly change the caption's look.
- On the canvas, click directly on the caption to select it, then:
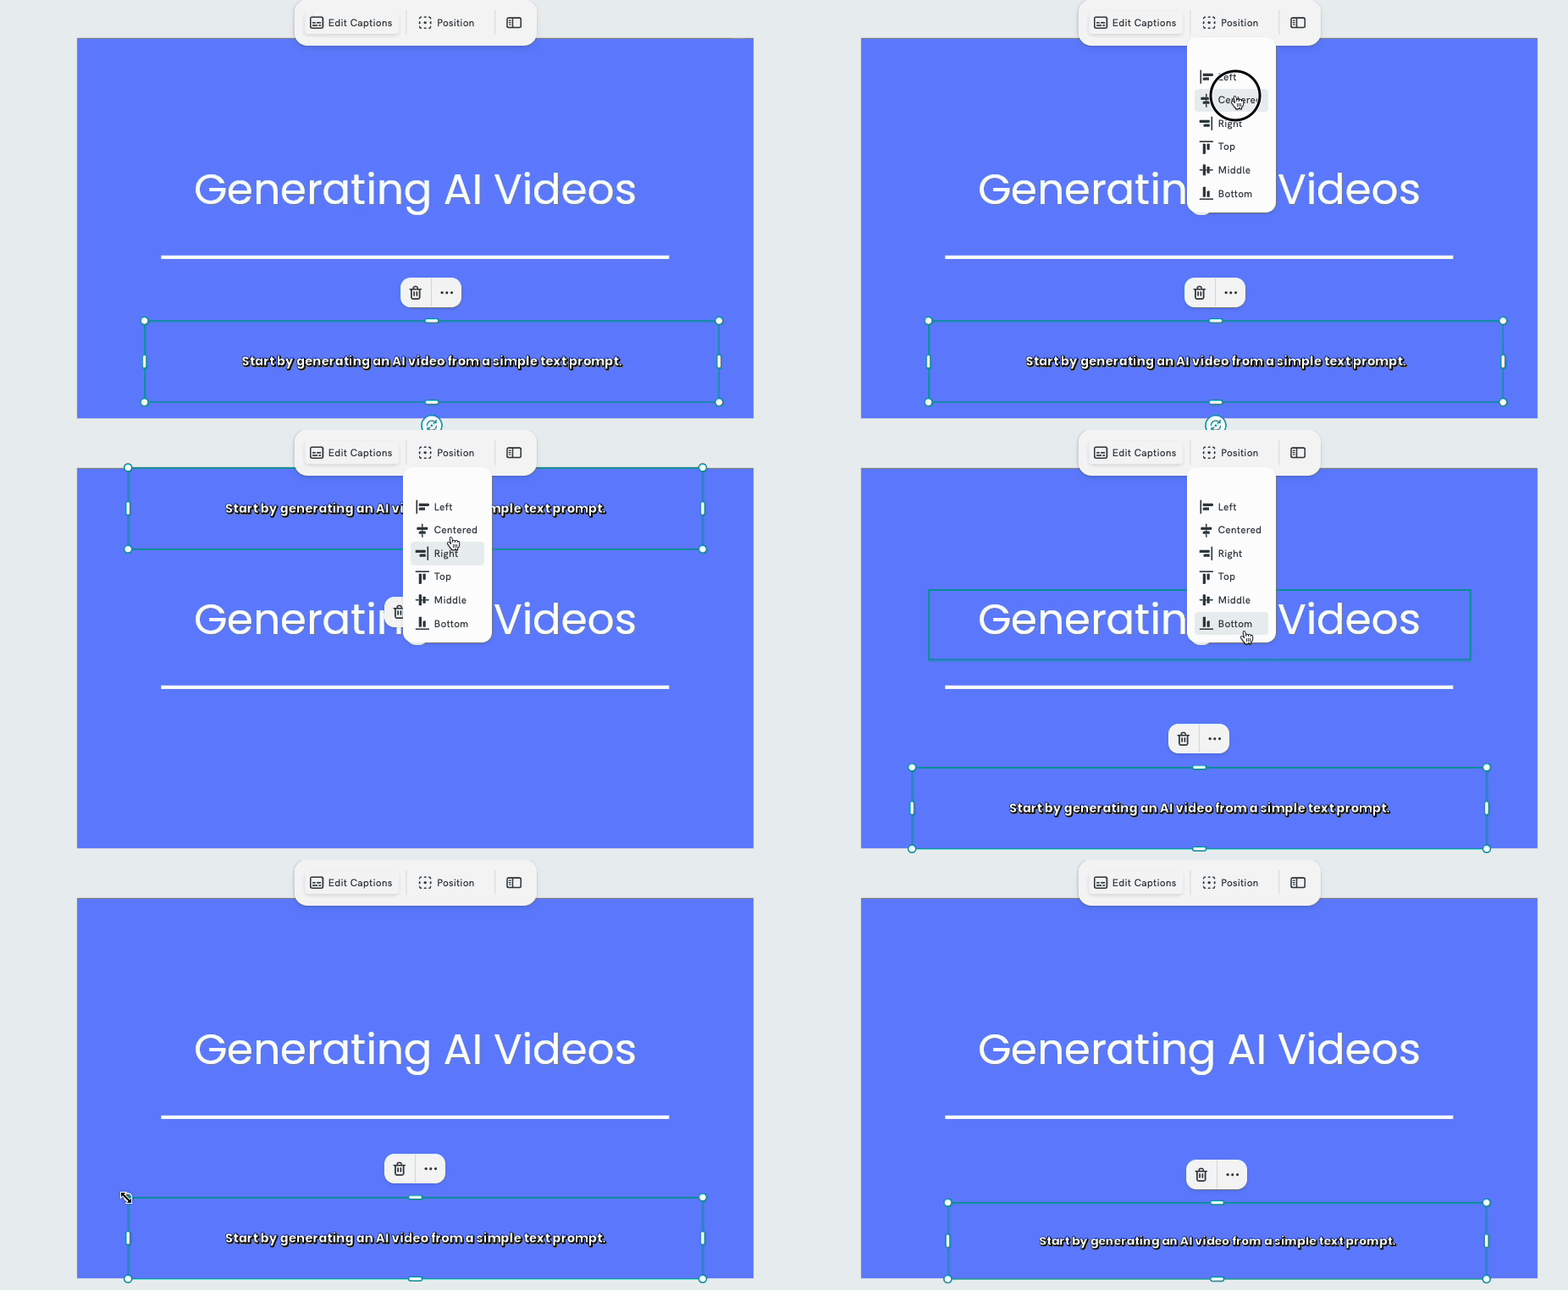
- Click the Position button for consistent alignment or drag it to reposition it anywhere on the video
- Drag the corner/edge handles to manually resize its width and height.
4.You can also click the dial icon on your selected style to open its detailed properties, and adjust the scale (and other available settings) to fine-tune the look.
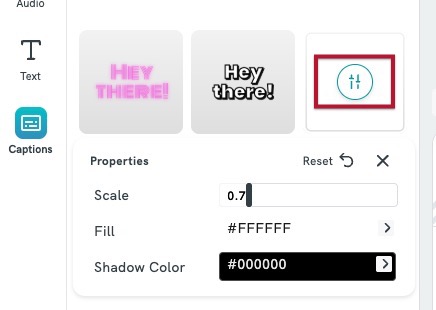
- Preview your adjustments directly on the canvas as you make them, and use the play button to check how the captions look while the video plays
Frequently Asked Questions
Can I change the caption language after generating it?
Yes — reopen the language dropdown under Auto Caption, pick a different language, and click Regenerate captions to redo them. However doing this replaces your current caption track and discards any manual edits you've made to it.
Will uploading an .srt or .vtt file replace my existing captions?
Uploading a file brings in the captions it contains; check your caption list on the Content tab afterward to confirm timing and content are correct before proceeding.
Do my caption style choices (fonts, presets, position) carry over if I regenerate captions? Regenerating replaces the caption text and timing; if this changes your styling, reapply your preset and reposition from the Style tab afterward.
Do captions get included automatically when I download the video?
Yes — once captions are added and styled in the editor, they're burned into the video when you export and download it.
What if a caption's timing doesn't match the audio?
Click Show timings on the Content tab to see each line's start/end time, then edit the text or use Merge with previous / Add after to adjust how the lines are split.