
How to Crop and Resize Your Video
Cropping and resizing your video in Piktochart helps you frame your content perfectly and adjust it to fit your design layout. Follow the steps below to get started.
IN THIS ARTICLE
How to Crop Video
Step 1: Go to your Video Editor
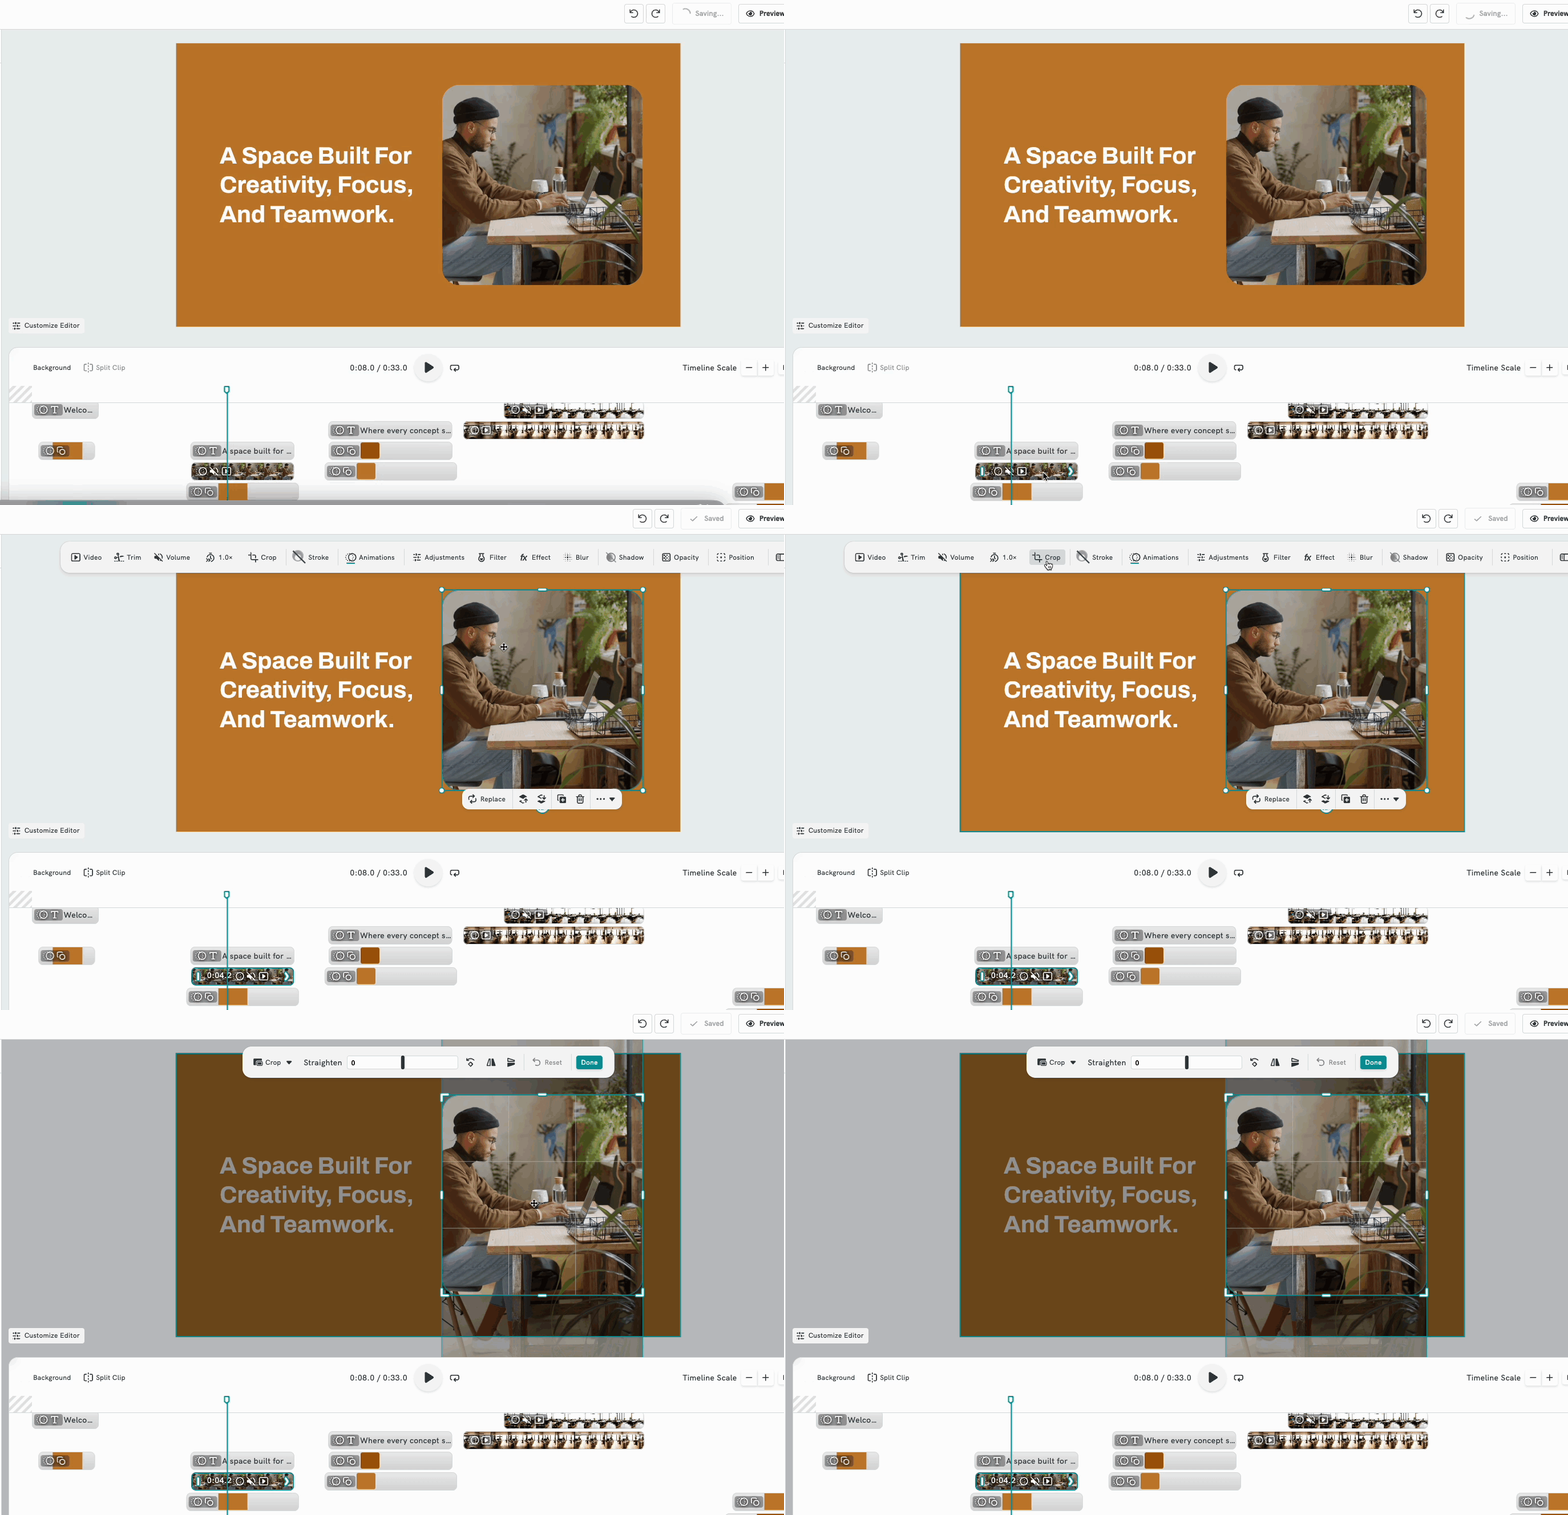
- Open your project in the Piktochart Video Editor.
- Click on the video clip on the canvas or in the timeline to select it.
- A green border with handles will appear around the clip, indicating it is selected.
Step 2: Open the Crop Tool
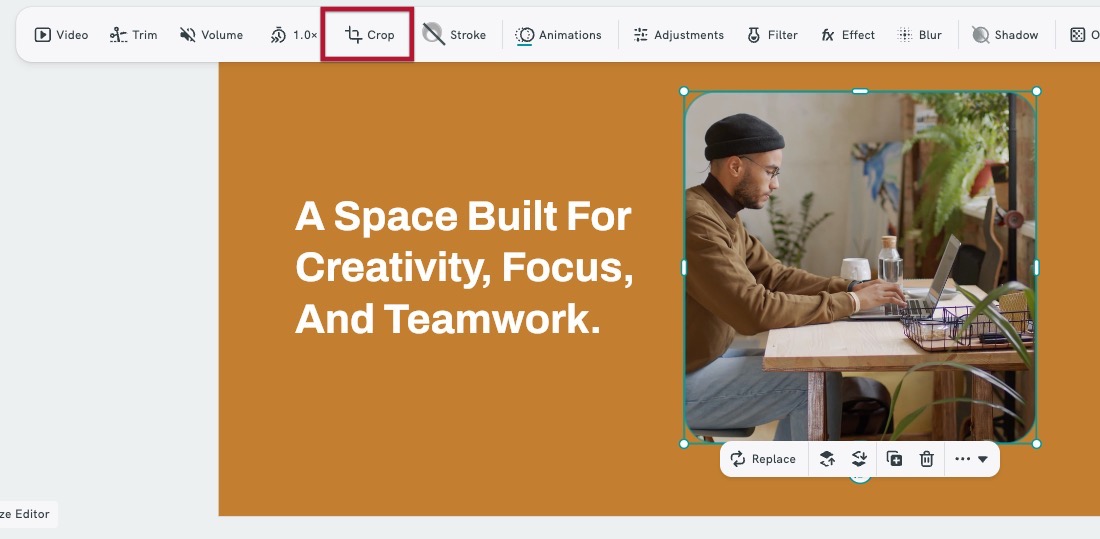
- With the video clip selected, look for the Crop option in the toolbar at the top of the editor
- The crop handles will activate, allowing you to adjust the visible area of the clip.
Step 3: Set the Crop Dimensions
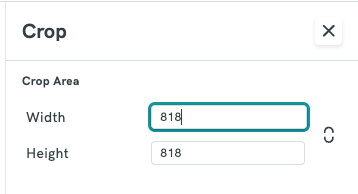
When the Crop button is activated, on the left panel,
- Click the Width field and type your desired width value.
- Click the Height field and type your desired height value.
- Press Enter or click outside the field to apply.
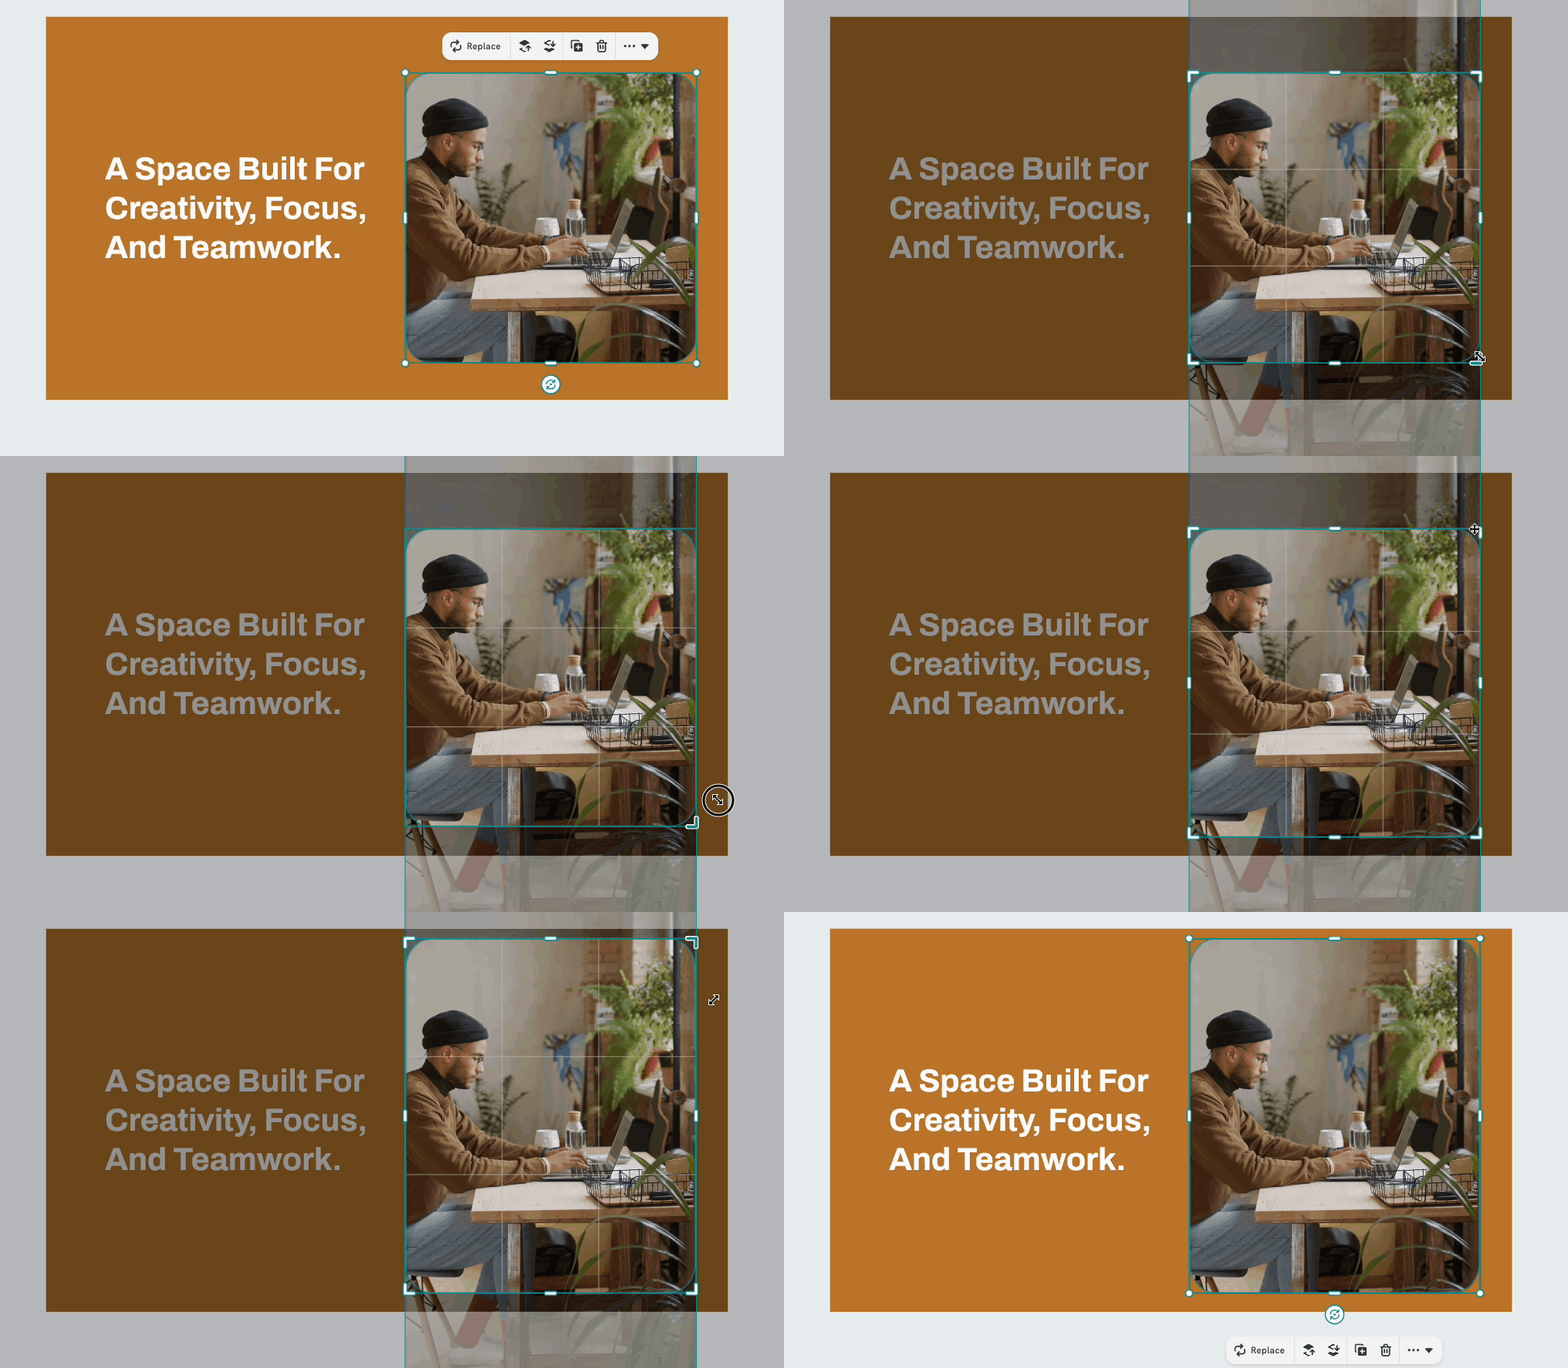
- Drag the corner or edge handles on the video clip to visually adjust the crop area.
- The Width and Height values in the panel will update automatically to reflect your selection.
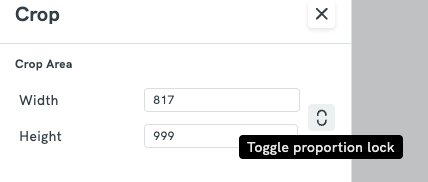
- Lock ON (chain linked): Adjusting either Width or Height will automatically update the other value to preserve the original aspect ratio. Use this when you want to crop without distorting the proportions of the video.
- Lock OFF (chain unlinked): Width and Height can be adjusted independently. Use this when you need a specific custom crop size regardless of the original ratio.
Step 4: Adjust the Crop Area
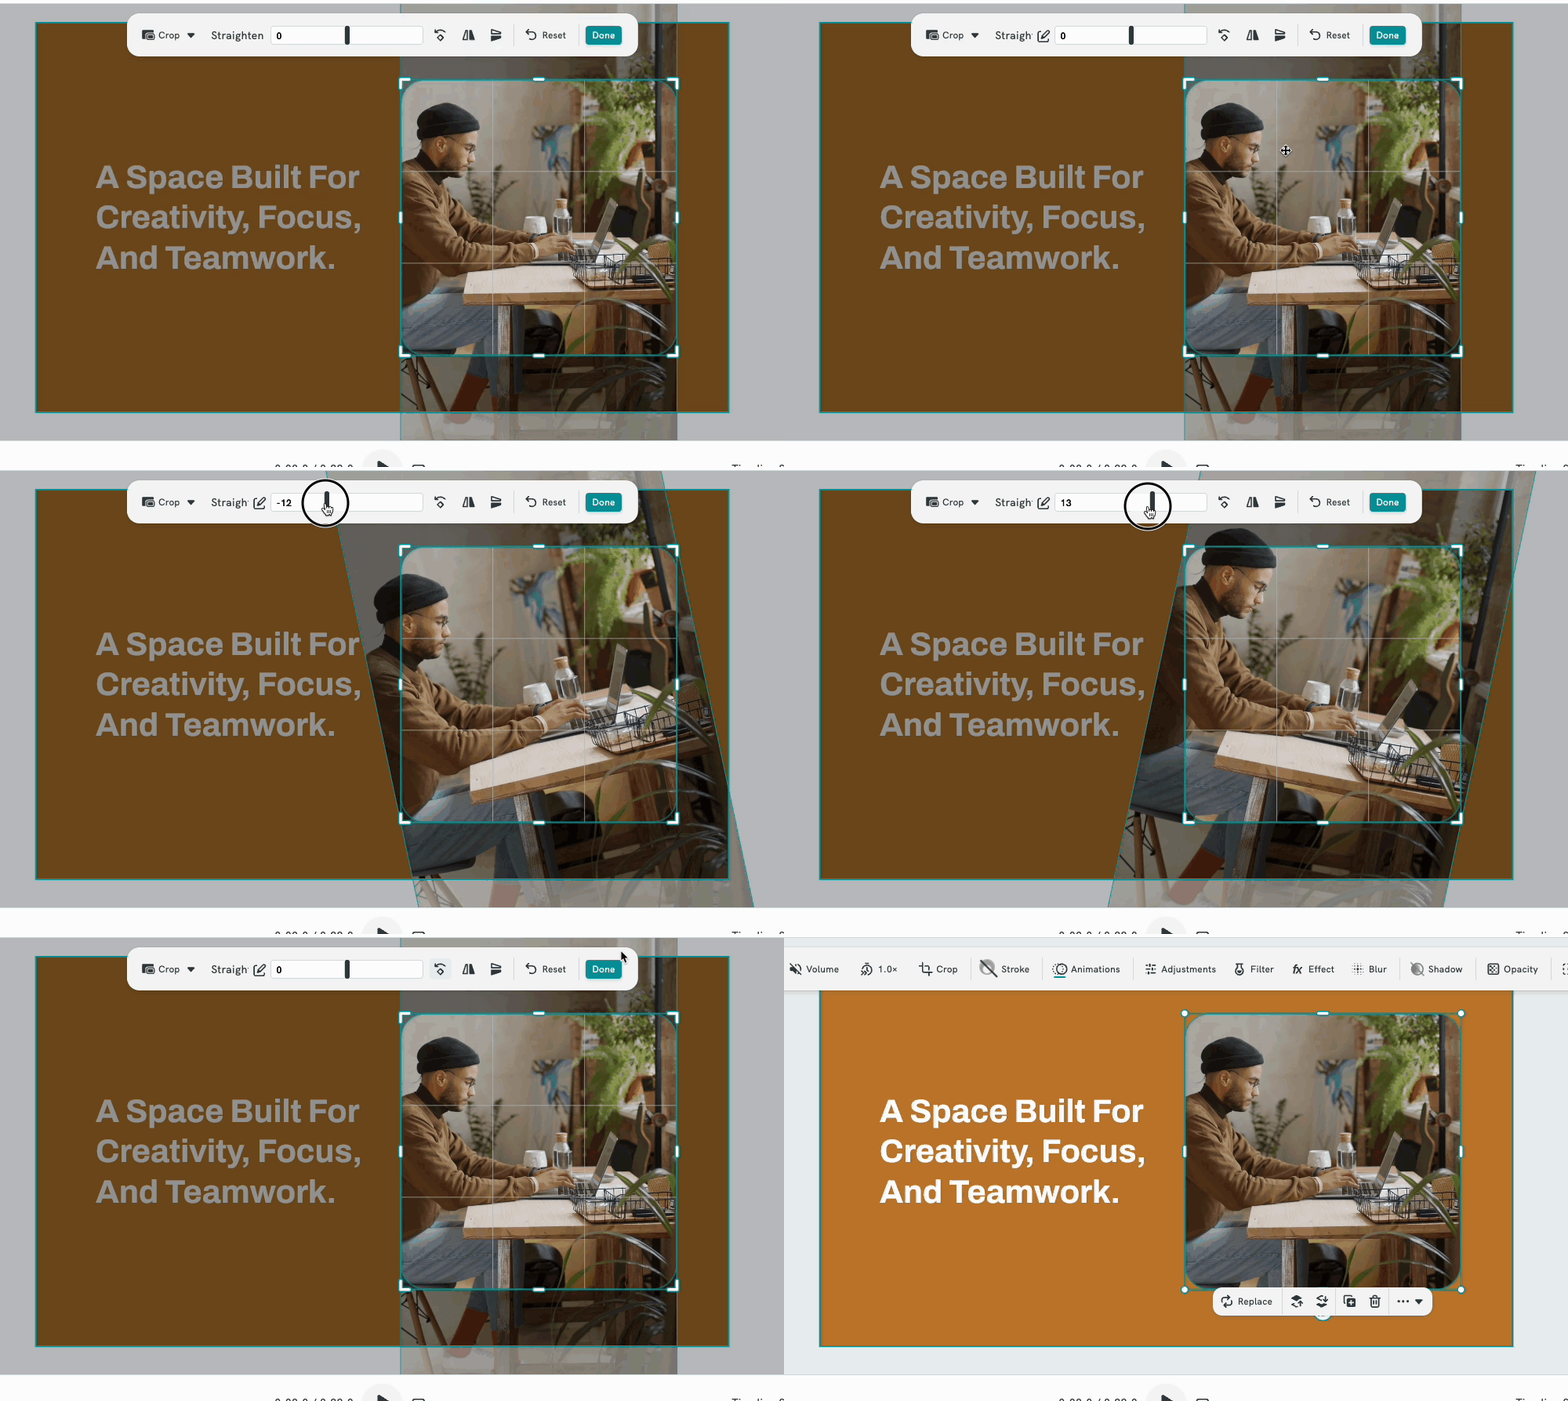
- Drag the handles to adjust the angle of the video.
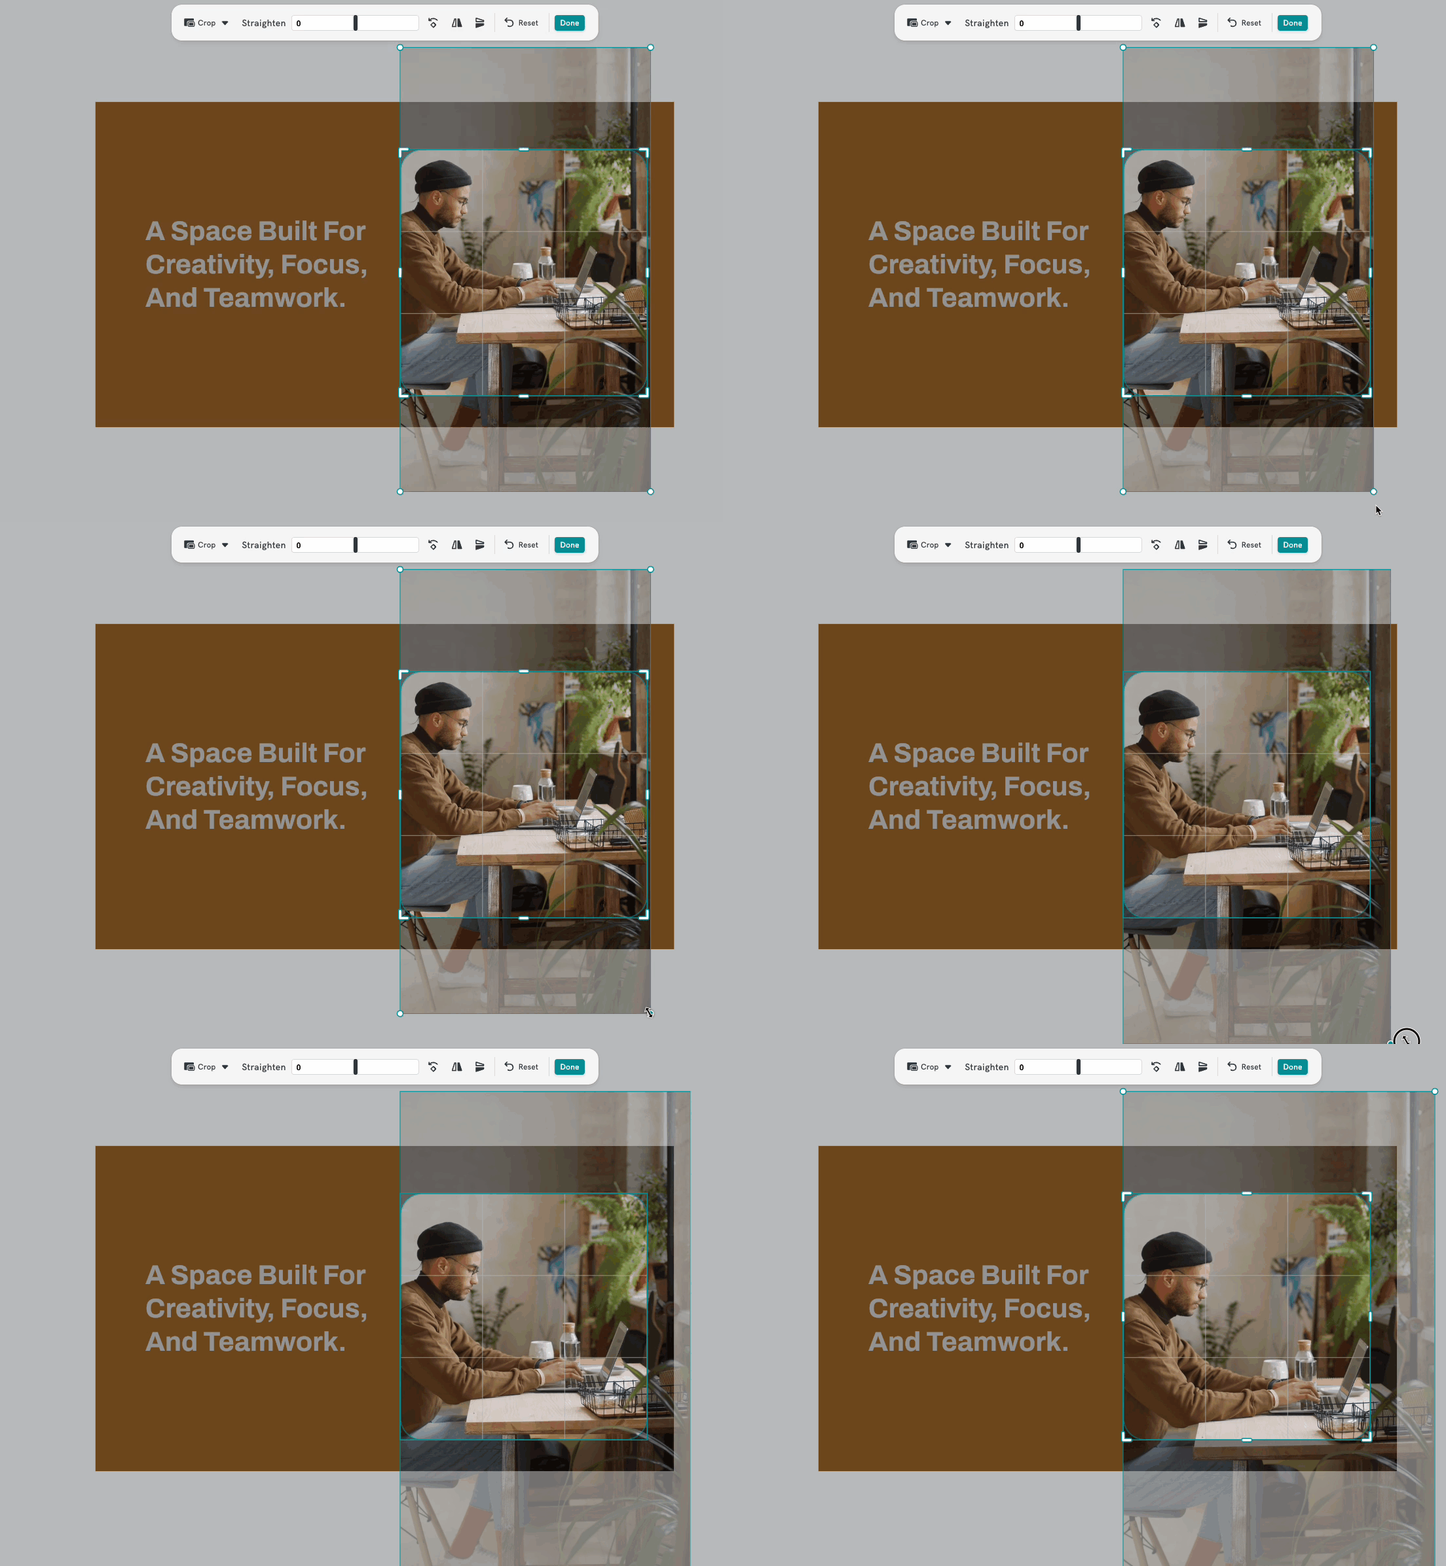
- Dragging a corner handle crops both dimensions simultaneously.
- Resize manually: Drag the edges or handles of the clip to adjust its size and focus certain portion of the video.
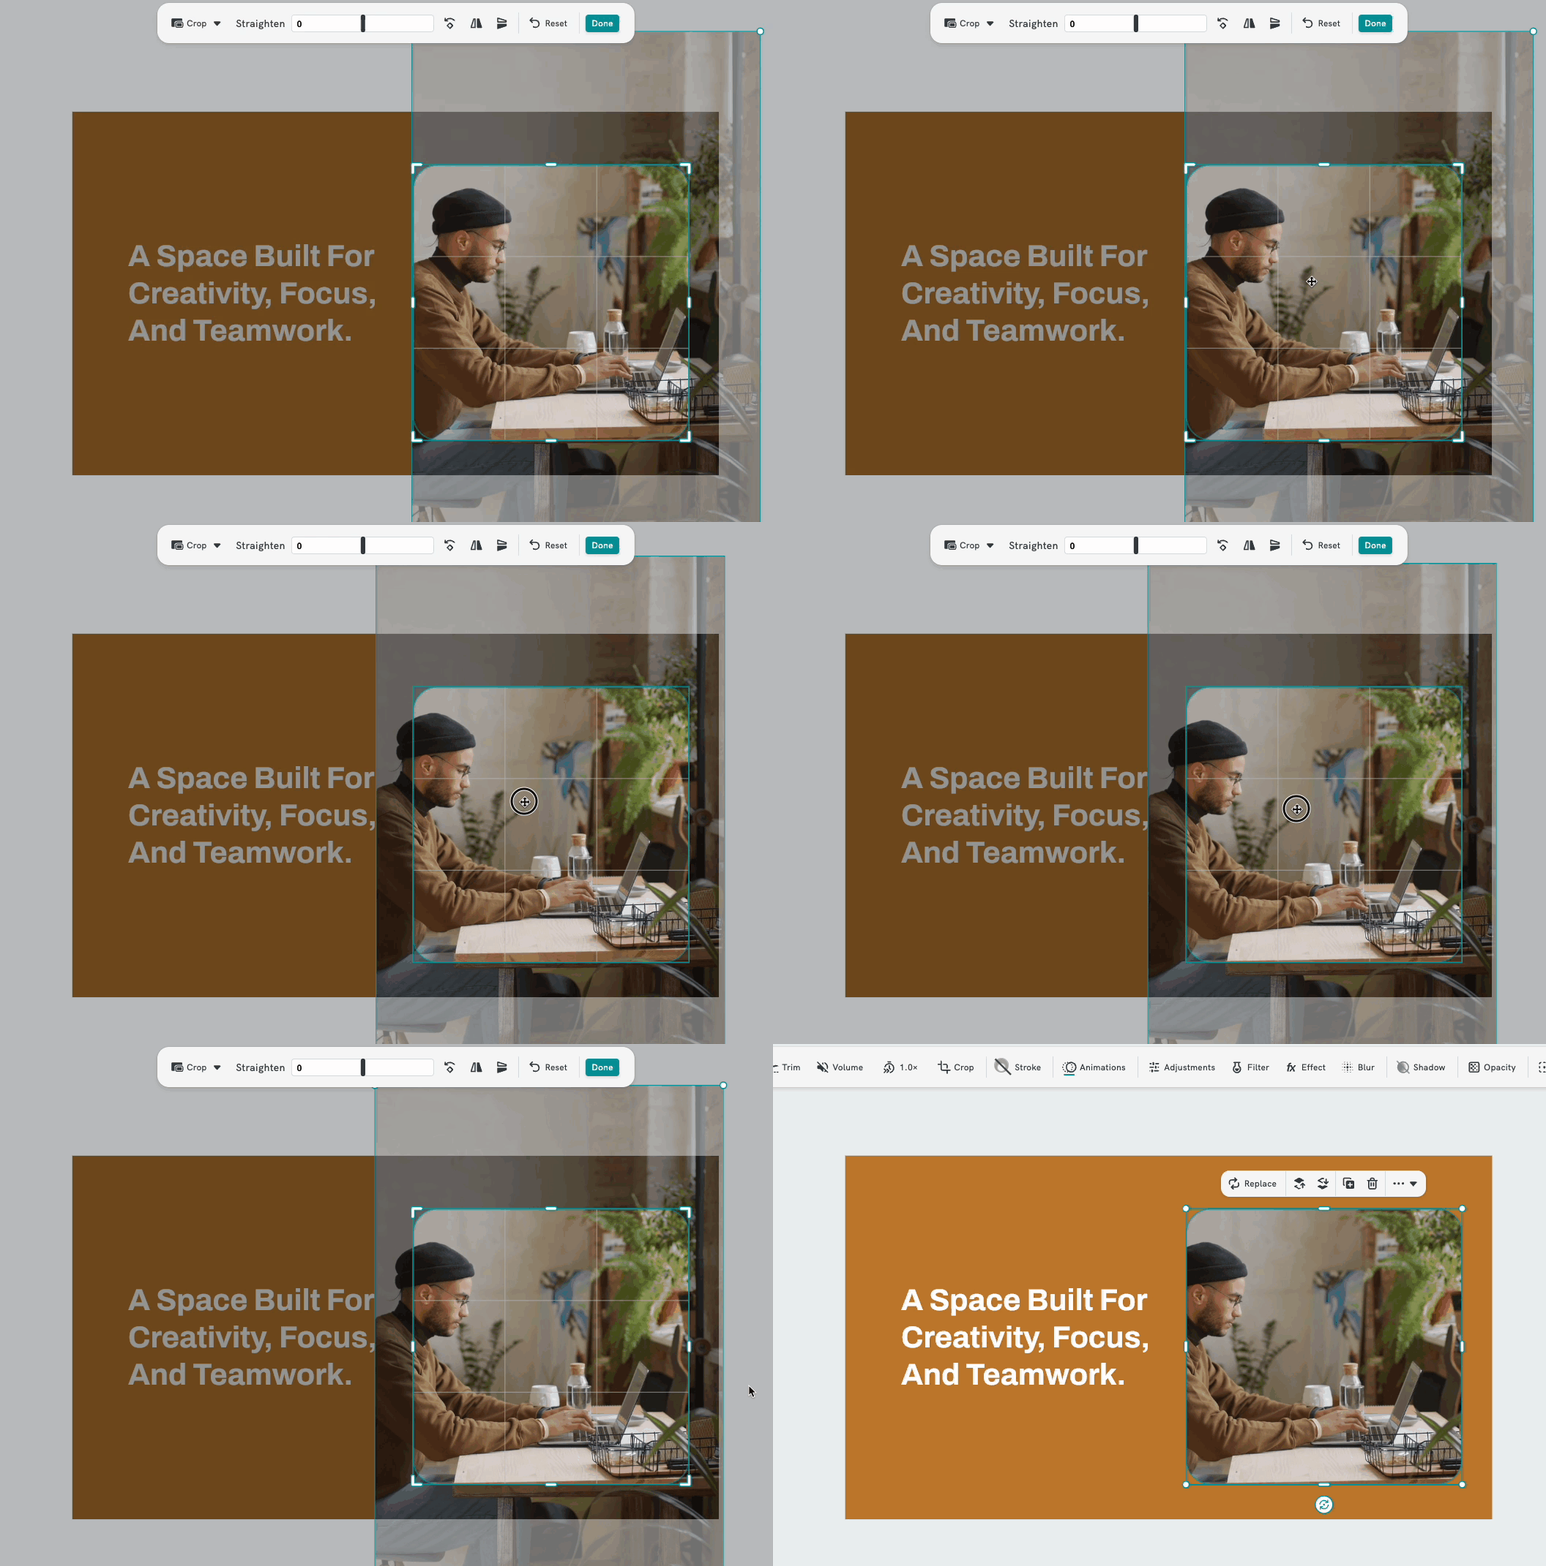
- You can also click and drag inside the crop area to reposition the visible portion of the video.
- Flip options: Flip the video horizontally or vertically as needed.
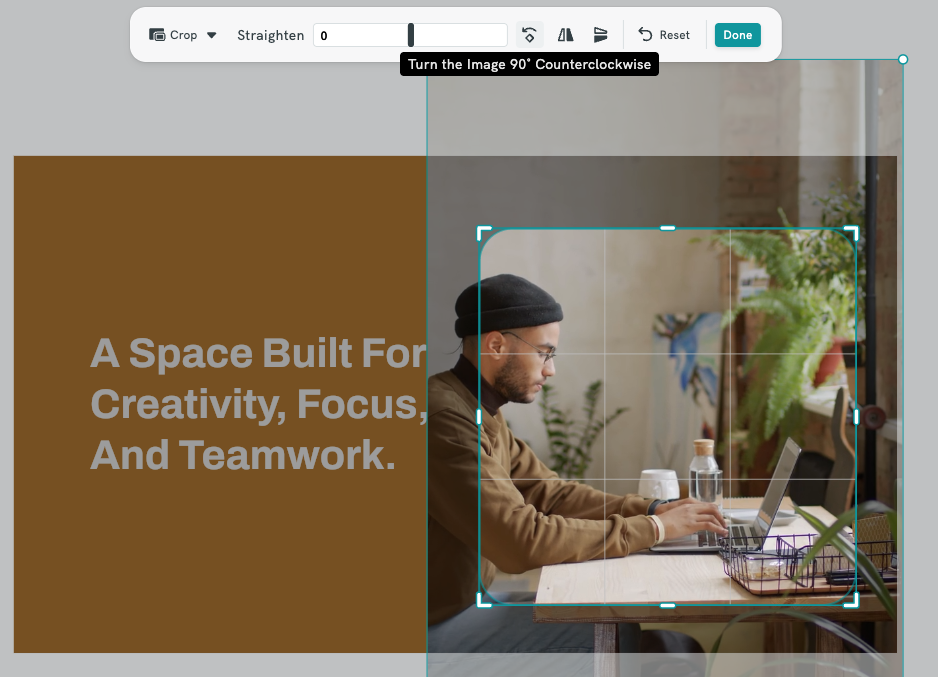
- Mirror image vertically or horizontally

- Reset: Click the Reset button if you want to revert to the original settings.
Step 5: Apply the Crop
- Once you are happy with the framing, click Done or press anywhere outside the frame to confirm the crop.
- The clip on the canvas will update to display only the cropped area.
TIPS 💡
- Undo a crop: Press Ctrl + Z (Windows) or Cmd + Z (Mac) to undo a crop at any time.
- Aspect ratio lock: If you need to maintain a specific aspect ratio (e.g., 16:9 or 1:1), look for the aspect ratio lock option in the crop toolbar before dragging the handles.
How to Resize Video
The Resize feature in Piktochart Video Editor lets you change the dimensions of your video project to fit different platforms and use cases. You can enter custom dimensions manually or choose from a library of preset sizes optimized for popular social media platforms.
Before You Begin
- Have a video project open in the Piktochart Video Editor.
- Note that resizing affects the entire project canvas, not just a single clip.
How to Access the Resize Panel
- Open your project in the Piktochart Video Editor.
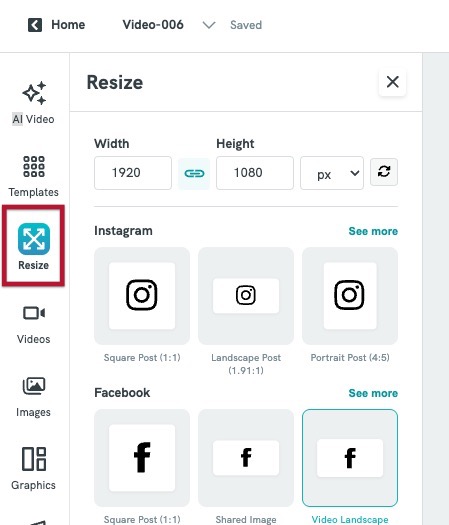
- In the left sidebar, click the Resize icon (the four-corner arrows icon).
- The Resize panel will open, displaying custom dimension fields and platform preset options.
Option 1: Enter Custom Dimensions
- In the Width field, enter your desired width value.
- In the Height field, enter your desired height value.
- Use the unit selector (default: px) to choose your preferred unit of measurement.
- Click the proportion lock icon (chain icon between Width and Height) to toggle aspect ratio locking:
- Lock ON: Adjusting one dimension will automatically update the other to maintain the aspect ratio.
- Lock OFF: Width and Height can be set independently.
- Click the swap icon (circular arrows) to instantly swap the Width and Height values, useful for switching between landscape and portrait orientations.
- Press Enter or click outside the fields to apply your dimensions.
Option 2: Use a Platform Preset
Available Platforms and Presets
| Platform | Preset | Aspect Ratio |
|---|---|---|
| Square Post | 1:1 | |
|
|
Landscape Post | 1.91:1 |
|
|
Portrait Post | 4:5 |
| Square Post | 1:1 | |
|
|
Shared Image | 1.91:1 |
|
|
Video Landscape | 16:9 |
| X (Twitter) | In-Stream Photo | 16:9 |
|
|
Profile Header | 3:1 |
|
|
Video | 16:9 |
| TikTok | Video | 9:16 |
|
|
Square | 1:1 |
| YouTube | Video | 16:9 |
|
|
Shorts | 9:16 |
|
|
Square | 1:1 |
| Square Post | 1:1 | |
|
|
Shared Link | 1:91:1 |
|
|
Portrait | 4:5 |
|
|
Video | 16:9 |
|
|
Story | 9:16 |
| Pin | 2:3 | |
|
|
Square Pin | 1:1 |
|
|
Story Pin | 9:16 |
|
|
Portrait Pin | 4:5 |
Steps to Apply a Preset
- Scroll through the Resize panel to find your desired platform (e.g., Instagram, Facebook, TikTok).
- Click on the preset thumbnail that matches your target format (e.g., Square Post (1:1) or Video Landscape (16:9)).
- The selected preset will be highlighted in teal, and the Width and Height fields will update automatically to reflect the preset dimensions.
- The canvas will resize to the new dimensions immediately.
TIP 💡
- Check your content after resizing: Resizing the canvas may cause clips, text, or graphics to shift. Review each scene after resizing to make sure everything looks correct.
- Platform-specific exports: Resize your project before exporting to ensure your video meets the platform's recommended specifications.
Frequently Asked Questions
Will resizing stretch or distort my video clips?
Resizing the canvas may cause clips and elements to reposition. Check each scene after resizing and manually adjust any content that appears stretched or out of place.
Can I resize my project after I've already added content?
Yes, you can resize at any point during editing. However, it's recommended to set your canvas size before adding content to avoid having to reposition elements afterward.
What units can I use when entering custom dimensions?
The Resize panel supports pixels (px) by default. Use the unit selector dropdown next to the dimension fields to change the unit if other options are available.
How do I quickly switch between landscape and portrait orientation?
Click the swap icon (circular arrows) next to the dimension fields to instantly swap the Width and Height values.
What does the proportion lock icon do in the Resize panel?
The proportion lock (chain icon) between the Width and Height fields keeps the aspect ratio consistent. When locked, changing one dimension automatically adjusts the other proportionally. When unlocked, you can set each dimension independently.
What is the difference between cropping and resizing?
Resizing changes the dimensions of the entire project canvas. Cropping trims the visible area of a specific video clip, removing unwanted edges or focusing on a particular part of the footage.
What does the Toggle Proportion Lock do in the Crop panel?
The Toggle Proportion Lock (chain icon between Width and Height) controls whether the aspect ratio is maintained when you adjust the crop dimensions:
- Lock ON: Changing one dimension automatically updates the other to keep the proportions consistent.
- Lock OFF: Width and Height can be adjusted freely and independently.
Can I crop multiple clips in the same project?
Yes. Each video clip can be cropped individually. Simply select the clip you want to crop and apply the crop settings independently for each one.
Can I revert a crop after applying it? A: Yes. Select the cropped clip and reopen the Crop panel to readjust the dimensions. You can also press Ctrl + Z (Windows) or Cmd + Z (Mac) to undo the crop immediately after applying it.
Q: Why doesn't my crop look right after I export?
Make sure you clicked Apply to confirm the crop before exporting. If the crop was not applied, the full clip will be exported. Re-open the Crop panel, adjust as needed, and click Apply before saving and exporting.